
|
Kerry Ohren kleben
Leider gibt es keinen Artikel auf Deutsche, der erklärt, wie man die Ohren eines Kerry Welpe in sanfter Form korrigiert. Im Folgenden bringen wir einen Artikel im Original von http://www.kerryblues.info/health-breeding/setting-kerry-ears-a-simple-explanation der als Klassiker für dieses Thema gilt.
|
||||||||||||||||||
|
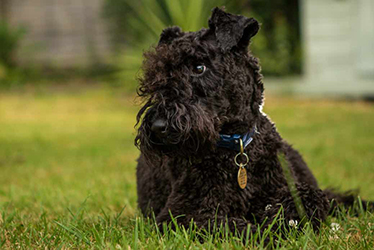
Setting Kerry Ears A Simple Explanation Picture: Don Mendo de La Cadiera, "Tim" by Sonya Aroaz By the age of about 12 weeks the ears have risen from hanging down along the cheek almost to the jaw line, to folding over at about the skull top, and tip pointing toward the outer corner of the eye. This is perfect--all that is wanted! The problem then is that all the puppy teeth fall out at once and by six or seven months a whole new set of teeth comes in, drawing heavily on the calcium in the system, and down go the ears! All that we do is to paste the tip of the ear to just where it is naturally before that fall--pointing to the outer corner of the eye. Usually this is done at the three or four months trim--the head and ears are clipped and the ears wiped out with an ear cleaner, and some of the hairs pulled out with the fingers or a tool. After a bath and drying, before the scissor trim of the body and legs begins, the ears are pasted. There are special pastes for this at dog shows or drugstores--they do not cause a rash. The ears set while the body is scissored. Four weeks later this is all repeated. The dogs do not seem to know anything is different. By seven or eight months the new teeth are all in, and the ears set exactly as they were naturally. Occasionally with large, thick ears, or tiny thin ones, it is necessary to repeat the pasting until ten or eleven months. Very seldom does a Kerry scratch his ears because they itch, but I try rubbing them, and if this does not take care of it, then I put a bandage over the ears for a few hours. Interesting that back about 1935 several top Kerries came over from England, and the famous terrier handler, Pop Sayres, realized that to compete in the terrier group that the ears would have to be encourages to stay alert, so he is the one who invented pasting! by Carol A. Basler, Rabasler@AOL.COM
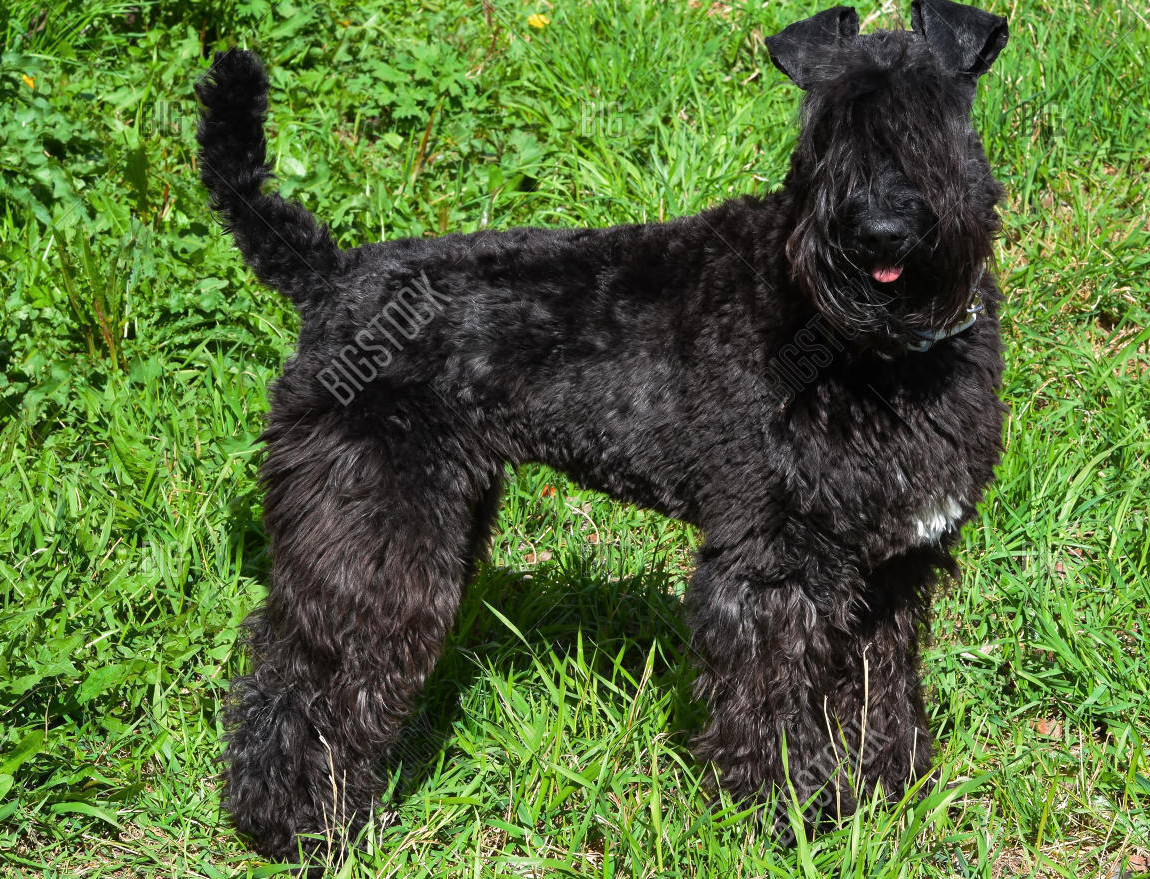
The ears of the Kerry Blue terrier, regardless of variations in size and texture, should never require surgical alterations to achieve the desired position. We are blessed, as owners, in that we do not have to put our Kerries through the cropping that other breeds face. We are able to develop that perfect frame of face with glue and patience. Kerry puppy ears fall naturally alongside the eyes. However, once the cartilage begins to set, the position of the ears must be controlled until the hardening process is complete. Cartilage begins to set usually at about three months of age and will continue for a variable period ranging from three months to a year or more. Without gluing, light or small ears will lift like a Fox Terrier's . Heavy or large ears will droop like a hound's. Even the Kerry with perfectly sized ears must be treated to ensure that the ears fall evenly. Contact the puppy's breeder as to their recommendations on a setter. If they are not able to assist you, the following instructions should see you through. Until the puppy is twelve weeks old, nothing need be done with the ears, except to clipper them and keep them lean. This process serves to condition your puppy to being handled during grooming. When your puppy turns three months old, give it a good bath and dry it thoroughly. Using an electric clipper with a #10 or #15 blade, clipper the head and ears, but do not back clipper as some hair is needed for the gluing. Start with the puppy on a grooming table with a grooming noose. After you have clipped the ears, trim the edges with scissors to clearly define their shape. Next you must thoroughly clean the puppy's ears of wax and hair. It is almost mandatory to have at least one additional person to help with the cleaning. While your assistant holds the puppy, pull all hair from inside the ears. A hemostat works well for this purpose. If the puppy fights your work, it may be necessary to take it from the grooming noose and wrap it in a large towel and lay it down on the grooming table. Once the ears are cleaned, put the puppy back in the noose. Sprinkle the ears and top of the head with BFI powder. Blow some of the powder into the ears or wipe out with R7, a drying liquid. This keeps the potential for infection to a minimum. Since the ears will be partially closed, they are more apt to become infected. There are two glues which I can recommend--Duo Surgical Adhesive or their eyelash adhesive and Val-A-Tear Mender. First you will set the inner part of the fold, toward the center of the skull. Place a small amount of glue, a line or dot about one inch long and 1/4 inch wide on the inner edge of the ear, with a dot of glue between ear and skull, starting just above the point where the ears rise from the head. Fold the ears over, matching the height above the head, and push the ear a little toward the center of the skull, holding it a short while until it is set. Be sure the puppy does not shake its head. The height above the skull is above the skull is dictated by the size of the ear. You do not want the fold to be any higher than it has to be to bring the tip to a position just beside the eye. Before you paste you can alert the puppy to see what he does naturally with his ears, then try folding them yourself. Somewhere between 114 inch to 1/2 inch above the skull is recommended. The ear should be set exactly where you want it, not very high because you think the ear is large. After pasting the fold, let the tip fall near the outer corner of the eye or just above the corner, and put on either a large dot of paste at the tip, or a thin v-line of paste. (fig. C) This method of pasting will leave an open space on each side, essential to prevent ear problems in the interior ear. In setting, remember the ear will grow with the puppy! Keep the puppy entertained on the table for about fifteen minutes to allow the glue to set up. You may use this time to trim the puppy. Just make sure he does not scratch at his ears during this time. If you must put him down on the floor, a piece of masking tape wrapped loosely around a front leg will keep the puppy busy for a time, and he will forget all about his ears. Some puppies just won't leave their ears alone or when you have several pups, the big game is to pull on your fellows' ears for sport. You can wrap the head with gauze or tape to protect the ears. Do not glue anything inside the ear across the top fold. It is ugly to have such a wide fold that a "hole" appears at the inner edge where the ear folds over. The coat will grow sufficiently in four weeks that you can cut the glue from ear and skull and repeat the procedure. Should one ear come down, put it right back up. Should the puppy scratch the ear loose and leave a sore on the skull, take down the other ear, using cold cream to loosen it. Get them both back up as soon as possible as soon as the sore permits. Immediately after pasting the ears look at them from the back and front to be sure they are identical, as you can move them slightly if necessary. Sniff the ears once or twice a week to be sure there is no infection inside the ear canal. If your puppy is entered in a Futurity, Sweepstakes or Sanctioned Match, the ears must be free. Be sure to paste them four weeks before the date. After showing, you or your breeder can put them back up right that day. Remember when you pasted the ears and never leave them pasted more than four weeks as the long hair will allow the ears to rise too high. Take the ears down twenty-four hours before the match as the puppy will often fly his ears after they are cleaned. If the ears are very small or very large or thick, it will be necessary to paste them longer as usual. When the permanent teeth are all in at seven months, the average ear is set and needs no further pasting. Not so the very large, thick, or small, which should be pasted until eleven or twelve months. If correctly done the fold will be level, folding over gently, with the tip touching the cheek at the outer corner of the eye. Wide ears and the skull, are helped by pasting the inner corner on the skull.. It should never be necessary to cut or sharply fold the ear-The American Kennel Club prohibits such cosmetic surgery.
Copydex Adhesive is manufactured in the UK by Henkel (Henkel Home Improvement & Adhesive Products), Winsford, Cheshire CW7 3QY, UK. Can be purchased from any hardware store in the UK and Ireland. Solvent-free, Copydex is certified to comply with stringent EC child safety legislation.
|
|
|||||||||||||||||
)
)
)